The automotive industry is constantly evolving, driven by technological advancements and consumer demands. As vehicles become increasingly complex, the need for detailed and accurate measurements of automotive parts has intensified.
3D scanning technology has emerged as a crucial tool, offering precise and comprehensive data that supports the production and maintenance of automotive parts.
High-tech 3D scanning helps aftermarket parts manufacturers and repair shops to meet rigorous standards and expectations by ensuring precision and quality.
This article explores how a 3D scanning service provider uses SCANOLOGY’s state-of-the-art SIMSCAN 3D scanning solution to adeptly tackle the measurement challenges in this sector.
3D Scanning Service Provider
Our client is a leading 3D scanning service provider specializing in 3D scanning, reverse engineering, and mechanical design.
Their expertise lies in capturing intricate details of various objects and converting them into accurate digital models.
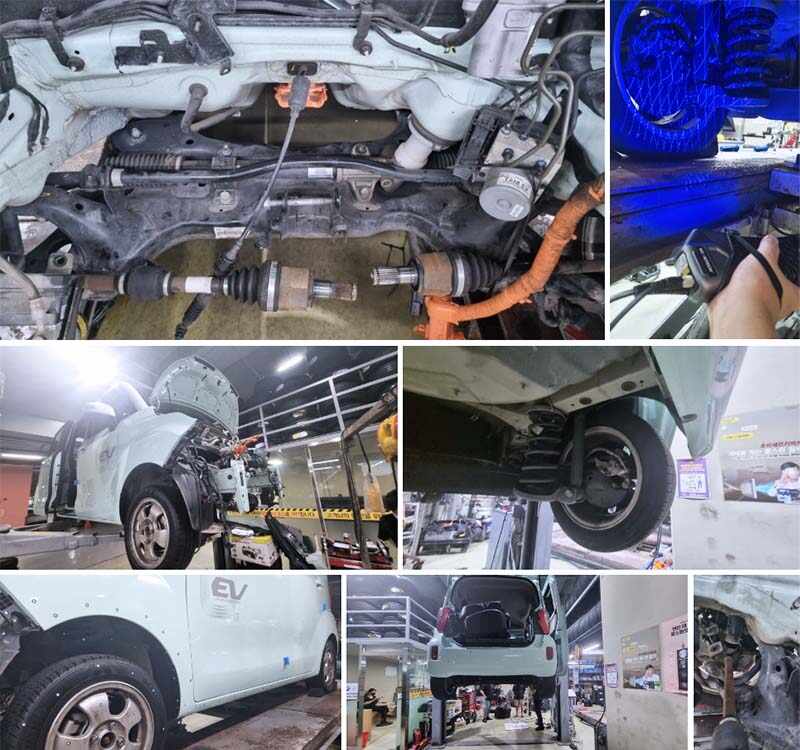
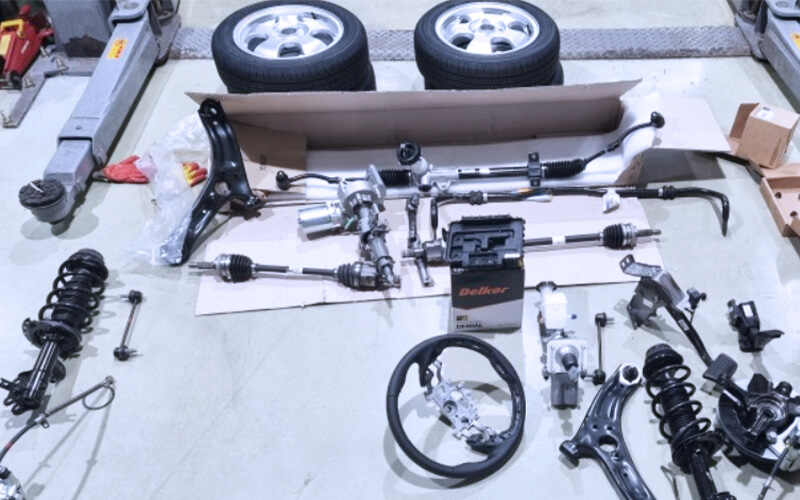
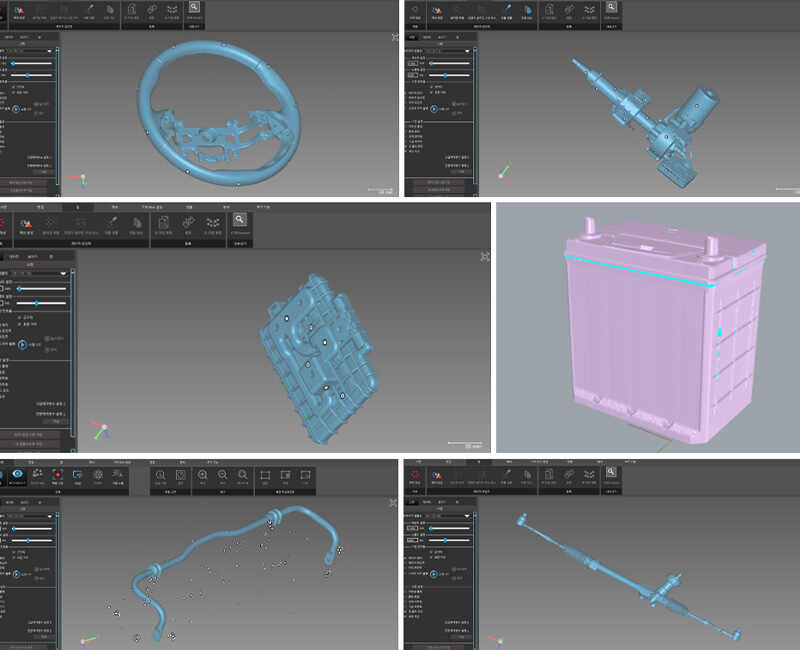
Recently, they were tasked with scanning and 3D modelling 30 automotive spare parts for an electric vehicle known for its innovative design and engineering.
Automotive Spare Parts to be Inspected
The automotive spare parts range from exterior body panels to intricate interior components. Each part required a detailed and accurate scan to ensure that the digital models could be used effectively for 3D modelling and further processes.
The exterior parts often have complex geometries and reflective surfaces, while the interior components typically come in intricate details. The diversity in size, shape, and material of these parts added complexity to the scanning process.
Measurement Challenges
3D scanning automotive parts presents several challenges. Complex geometries, reflective and dark surfaces, and limited access to tight spaces complicate data capture.
Large surfaces require consistent accuracy, and high precision is essential. Speed is crucial for industrial efficiency, and integrating multiple scans accurately is challenging.
Another significant challenge was the need to complete the scanning process within a tight timeframe. The client required the scanning of all 30 parts to be completed within 120 minutes.
This necessitated a scanning solution that could deliver high-speed performance without compromising the quality and accuracy of the data.
Limits of Previous Measurement Methods
Traditional measurement methods, such as callipers, gauges, and coordinate measuring machines (CMM), have several limitations.
These methods are often time-consuming, require manual intervention, and may not capture the full 3D data of intricate parts.
These limitations necessitate the adoption of advanced 3D scanning technologies that can overcome these challenges and deliver superior results.
SCANOLOGY’s 3D Solutions
SCANOLOGY’s smart handheld 3D scanner SIMSCAN addresses these issues with high-precision scanning, versatility on various surfaces, a compact design for confined spaces, and fast scanning speeds.
Its non-contact measurement ensures delicate parts remain undamaged, and advanced software aids in precise alignment, overcoming environmental variables and enhancing manufacturing and repair.
High-Speed Scanning: The SIMSCAN can capture high-precision data at an impressive speed of 2.8 million measurements/s, allowing the scanning of all 30 parts within the required 120-minute timeframe. This efficiency is critical for meeting tight deadlines without sacrificing quality.
High accuracy: The advanced scanning capability and algorithms of the SIMSCAN ensured precise alignment and comprehensive data capture, enhancing the overall accuracy of the inspection process with an accuracy of up to 0.020 mm.
Detailed Interior Scanning: With its compact design and high precision, the SIMSCAN can access and scan interior components effectively, capturing every detail with high accuracy.
Adaptability to Various Surfaces: The SIMSCAN excels in scanning dark and reflective surfaces. This capability is particularly beneficial for automotive parts, which often have such challenging surface properties. By handling these surfaces with ease, the SIMSCAN saves significant time and effort, streamlining the entire inspection process.
Benefits of SCANOLOGY’s 3D Solutions
The adoption of SCANOLOGY’s SIMSCAN offered several benefits to the client:
Ensuring Fit: SIMSCAN ensures that new or replacement parts will fit correctly with existing components, thanks to its accurate scanning capabilities.
Reproducing Parts: The SIMSCAN’s high-resolution scanning capabilities enable capturing intricate details of existing parts, facilitating the creation of precise digital models for reproducing partsthat need to be replaced.
Maintenance Records: With SIMSCAN, maintaining accurate records of parts and their conditions over time is simplified, aiding in effective maintenance and repair operations.
Custom Modifications: The portable SIMSCAN allows for quick and precise scanning of existing parts, enabling the design of custom or modified parts that fit seamlessly.
SCANOLOGY’s SIMSCAN 3D scanning solution proved to be a game-changer for the client, addressing all the significant challenges associated with scanning automotive spare parts.
The high-speed and precise 3D scanning and the ability to handle difficult surfaces and confined spaces resulted in a highly efficient and effective scanning process.
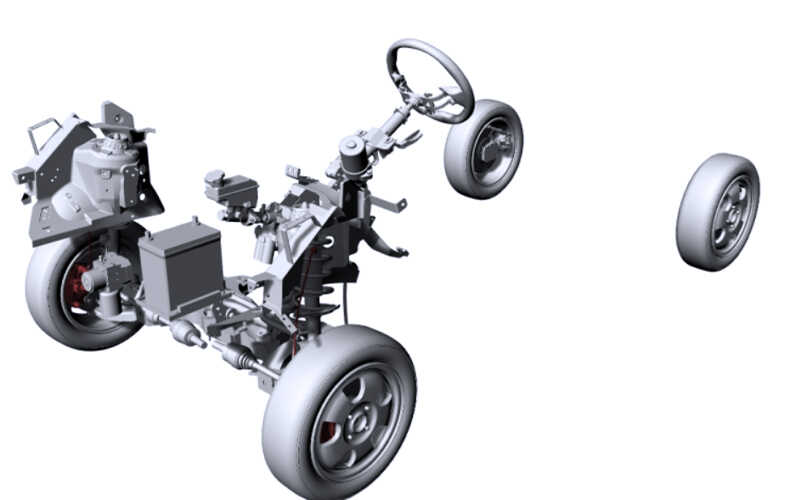
The detailed and accurate 3D data obtained from the scans enabled the client to perform precise 3D modelling, ultimately contributing to the advancement of their services in the automotive industry.
This case study underscores the transformative potential of cutting-edge 3D scanning technology in overcoming complex measurement challenges and enhancing operational efficiency.


